
")
Did you know that WPGuidePro is a multisite network? We use WordPress multisite backup to manage different language versions of the website. We make sure that everything is done safely and correctly.
If you have your own multisite network, the most important thing is to take regular backups. Backups keep your main website and all smaller websites safe from issues like hacks, server problems, or data loss
Our personal recommendation is to use the Duplicator Pro plugin to backup your WordPress multisite. It is a powerful plugin that makes the backup process simple and easy. But we know that not everyone likes to use plugins.
That’s why in this guide we will tell you three ways to backup a WordPress multisite network:
- With a multisite backup plugin,
- Manual backup using file manager/FTP and phpMyAdmin,
- Or by hiring a professional service
Want to stay ahead with AI-driven change footer in WordPress insights and stay updated with the latest trends? Subscribe for daily search insights at wpguidepro.com to improve your WordPress strategy!
Table of Contents
Why You Should Backup Your WordPress Multisite
Here at WPGuidePro, we use WordPress multisite network to manage different language versions of our website. That’s why we know how important it is to keep everything secure and up to date. And one way to do this is by taking a multisite backup.
WordPress multisite backup protects your entire network, such as the main site and all subsites, from any major problem.
For example, if your website goes down due to some mistake or server problem, then with a recent backup you can save your data. And you can get your website back up and running quickly.
Taking backup is also very important for security. If your site gets hacked or infected by a virus, you can restore your clean backup to make your site safe. This saves both your time and money.
Taking backup is also useful when you want to make any major change in your multisite network. For example, taking backup is necessary before updating theme, plugin, or WordPress. So that if something goes wrong, you can bring your site back to the old and well-functioning condition
Now let’s see what are the 3 ways to take backup of WordPress multisite network. These methods will work for you whether your multisite is in subdirectory style or with separate domains.
Method 1: Use Multisite Backup Plugin (Easiest Way)
If you are a beginner and want to take backup of your WordPress multisite, then the easiest way is to use a plugin that supports multisite.
A good plugin handles everything on its own, so you do not have to worry about technical things
We have tested a lot of plugins, but Duplicator Pro turned out to be the best.
This plugin not only creates a backup of your website, but also gives you the option to recover it in case of a major problem.
The only issue is that Duplicator Pro is not free. There is a free version but for multisite backup you will have to buy the Pro version which costs $199.50 per year. But when you are running many sites on a network, it is worth the money.
If you want to see in detail, you can see our Duplicator Review.
Step 1: Install and activate Duplicator
- After purchasing Duplicator Pro, login to your WordPress multisite network as super admin.

- Install the plugin and click on Activate Network.
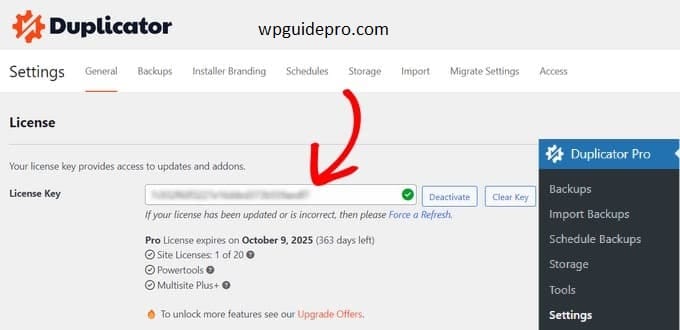
- Then go to Duplicator Pro » Settings, paste the license key and activate.
Step 2: Create a Multisite Backup
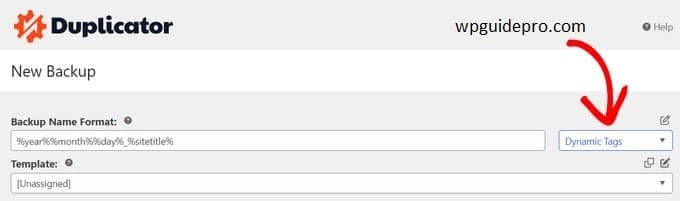
- Go to Duplicator Pro » Backups and click on Add New.
- Name your backup (adding a date or time is a good idea).
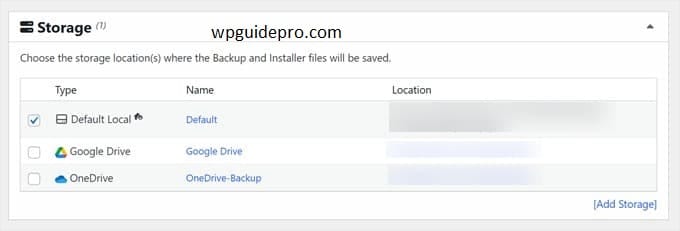
- Choose a place to save the backup: on your server or in the cloud like Dropbox, Google Drive, OneDrive etc.
- You can decide whether to back up the entire network or just some sub-sites.
- You can also set a password or enable encryption for extra security.
- After everything is set, click on Next and then click on Create Backup.
- After the backup is created, download your backup files so that they come in handy in an emergency.
- Restoring a Backup
- Go to Duplicator Pro » Backups.
- Click on Restore along with the backup you want to restore.
- Accept the Terms and click on Restore Backup.
- After recovery, login to your site.
- Then delete some extra files so that the site runs clean and fast.
Extra Tips:
- Set a Disaster Recovery Point so that if something goes wrong, the old site can be easily recovered.
- Create an Automatic Backup Schedule so that you do not have to do manual backup every day.
- While creating a schedule, choose the time and place (server or cloud) of backup.
- Set the time for daily, weekly or monthly backup.
- Enable it and click on Save Schedule.
Method 2: Use File Manager/FTP + phpMyAdmin (Manual Backups)
If you are on a budget or want to learn how to manually backup your WordPress multisite without using a plugin, we will guide you step by step.
This method gives you more control over your backup, but it can be a little tricky for beginners.
For this method, you will need to use either an FTP client or your hosting’s file manager, so that you can download all the files from your website. You will also need to backup your WordPress database using phpMyAdmin.
It is important to do both of these things, because if you backup only files or only database, your backup will not be complete.
Let’s see the process step by step now.
Step 1: Taking backup of WordPress files (via FTP or File Manager)
We will use Bluehost’s file manager here for example, but the process is similar in almost every hosting and FTP client.
- Login to your Bluehost dashboard and go to the ‘Websites’ tab.
- Select the site you want to backup and click on ‘Settings’.
- Scroll down and click on ‘File Manager’ from ‘Quick Links’.
- In the new tab, find the ‘public_html’ folder (or root folder).
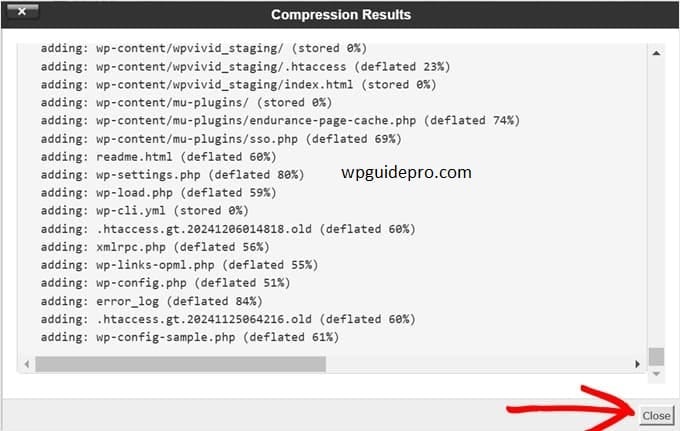
- Select all the files under public_html and click on ‘Compress’ above.
- Select ‘Zip Archive’ in the popup and click on ‘Compress Files’.
- When the compression is complete, click ‘Close’.
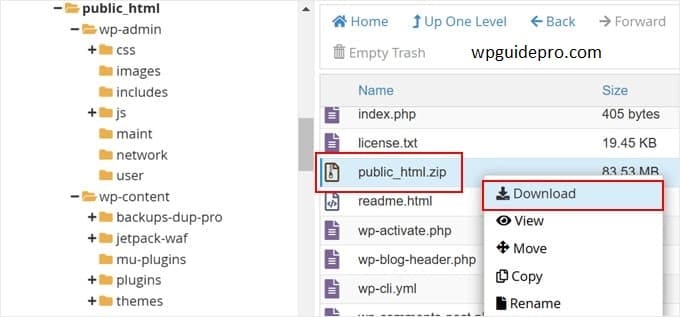
- Now search for the new zip file in public_html, select it and click on ‘Download’ to save it on your computer.
This will create a backup of all the files in your multisite network such as themes, plugins and media files.
Step 2: Backup WordPress Database (using phpMyAdmin)
Now let’s create a backup of the database.
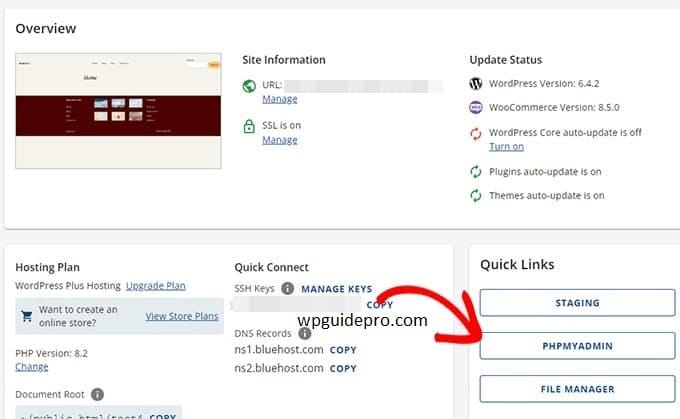
- Go back to the Bluehost dashboard and click on ‘phpMyAdmin’ from ‘Quick Links’.
- phpMyAdmin will open in a new tab.
- Select your WordPress database on the left side (which is usually the name of your main site).
- If you don’t know, you can check the DB_NAME in the wp-config.php file.
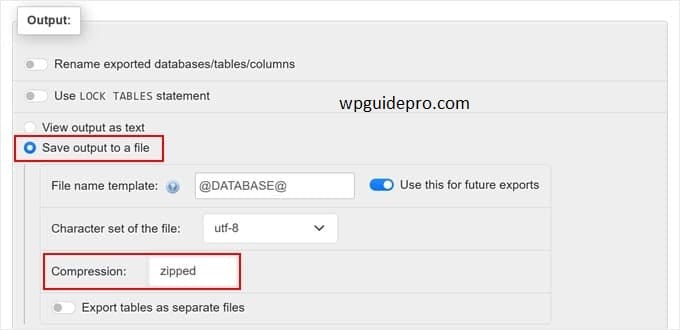
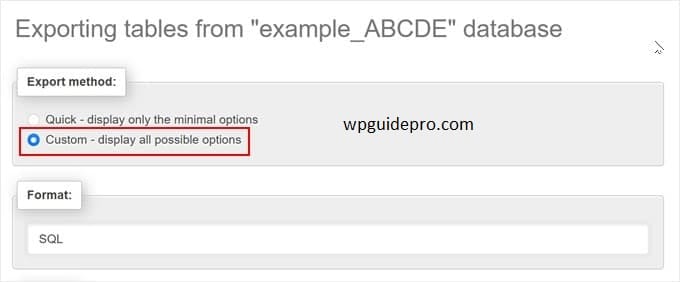
- After selecting the database, click on the ‘Export’ button above.
- Choose ‘Custom’ in the ‘Export Method’ and leave the format ‘SQL’.
- Select ‘Save output to a file’ in the ‘Output’ section below.
- You can select ‘zipped’ or ‘gzipped’ for compression (this makes the file smaller).
- After everything is set, click on the ‘Export’ button.
- A compressed backup file of your database will be created and downloaded.
