

Have you ever wondered how people interact with your WordPress website? Where do they click the most? And which things do people ignore?
Heatmaps show you all these things like pictures, so you can improve your website – so that more people engage and get more conversions (meaning more people buy something or fill out a form).
Whether you have a blog, an online store, or you’re collecting leads, applying heatmaps gives you data that will help you make the right changes.
In this blog, we will tell you 2 easy ways to put heatmaps on WordPress site.
And in the end we will also share some extra tips, so that you can take full advantage of your heatmaps.
Want to stay ahead with AI-driven in WordPress insights and stay updated with the latest trends? Subscribe for daily search insights at wpguidepro.com to improve your WordPress strategy.

Table of Contents
Why Do You Need to Set Up WordPress Heatmaps?
WordPress Heatmap is a tool that shows you what people do on your website like where they click, how far they scroll, and what they spend the most time on.
This tool is very useful for people who want to improve their website.
Benefits of Heatmap:
• What people like: See what text or buttons people click on and what things they ignore.
• Sell more or get results: Fix things that aren’t working, like confusing buttons or places where people leave the site.
• Make the website easy: See which menus or options people don’t use, then improve them.
• Check new designs: When you try a new design, you can see from the heatmap how people are reacting to it.
By using the heatmap, you can easily understand how to make your website better so that people are happy and your website works well.
Step 0: Preparing Your WordPress Site for Heatmaps
Some preparations are necessary before installing the Heatmap tool.
1.Install Analytics tools First check whether your site has tools like Google Analytics installed.
Heatmap shows you what people are doing like a picture, and Analytics tells you where people came from, which country they are from, and how long they stayed on the site.
2. Make the website fast Heatmap tools install a small script that can slow down the site a bit.
So make your website fast like compress images, turn on caching, and use a light (lightweight) theme.
3. Choose important pages
Think about which pages of your site are most important.
It is better to apply heatmap on those pages where more people visit such as:
- Landing pages (the first page people see)
- Product pages
- Popular blog posts
- Checkout or form filling pages
Once these 3 steps are completed, you can easily apply heatmap on your WordPress site
Method 1: Set Up WordPress Heatmaps Using Microsoft Clarity
Microsoft Clarity is a free and powerful tool that shows you what people are doing on your website. It also includes heatmaps, session videos and analytics.
Step 1: Create a Microsoft Clarity account
- Go to Clarity’s website: clarity.microsoft.com
- Create a free account with Microsoft, Google or your email

Step 2: Create a new project
- Login to Clarity and click on “New Project”
- Write down the name and URL of your WordPress website

Copy the tracking code you get after setup
Step 3: Connect Clarity to WordPress
- Install a plugin on WordPress called: Insert Headers and Footers
- Go to the WordPress dashboard: Settings > Insert Headers and Footers

- Paste the Clarity code in the “Scripts in Header” box and save it
Step 4: Check the data
It will take some time – you will see it after a few hours You can see your data in the Clarity dashboard Heatmaps and session videos will be available in the “Dashboard” tab
Benefits of Microsoft Clarity:
• Absolutely free and easy to use
• Shows video of people’s activity
• There is no limit on any user or traffic
Some drawbacks:
• Advanced filters are a bit less (compared to paid tools)
Method 2: Set Up WordPress Heatmaps Using UserFeedback
If you are looking for an easy and beginner-friendly tool for WordPress, UserFeedback is a great option.
Step 1: Install UserFeedback Plugin
- Go to WordPress plugin section and search for “UserFeedback”

- Install the plugin and activate it
Step 2: Setup Settings
- After activating, go to UserFeedback > Settings in WordPress dashboard
- Connect your UserFeedback account (if you don’t have an account, create one for free)
- Choose the pages or posts where you want to see the behavior of people
Step 3: Customize Options
- Set click or scroll tracking options in the plugin settings
- Turn on heatmaps for the pages you chose
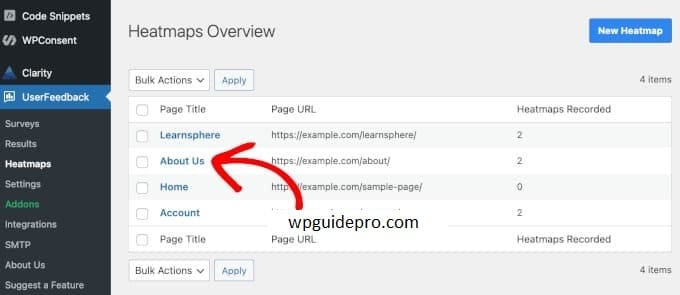
Step 4: View Data
When the plugin is activated, then UserFeedback > You can see live heatmap data by going to the Reports section right inside WordPress
Benefits of UserFeedback:
• Specially designed for WordPress users
• Real-time (live) data is available right in your dashboard
• Very easy to install and use
Some drawbacks:
• Free version has fewer features
• Fewer integrations compared to tools like Microsoft Clarity
Bonus Steps: Maximize Your Heatmap Insights
Heatmaps are just the beginning the real benefit comes when you understand their data and take action on it.
Here are some tips that will help you reap more benefits:

1. Look at your visitors in groups
More heatmap tools give you the option to filter people by device, location, or traffic source.
For example:
Are mobile users having trouble clicking the CTA button (call-to-action)?
What content do desktop users spend more time on?
2. Make a combo of Heatmaps + Analytics Link
Heatmap data with Google Analytics to get more detail.
Example:
If people are clicking too much on a button but not making a purchase, then there may be an issue with the checkout page.
3. Do A/B Testing
Use the Heatmap data to make some changes to the website — then do an A/B test to understand what is working better.
Example: If you move the CTA button up, are people clicking more?
4. Keep checking heatmaps
- Over time People’s behavior changes over time.
- Check heatmaps every half year to understand new issues.
5. Ask your visitors directly
- Tools like UserFeedback have options like quick polls or short surveys.
- You can ask people directly what they like or don’t like.
Tip: Heatmap + direct feedback = perfect combo!
Setting Up Heatmaps Is Just the Start
Heatmaps give you clear and useful data about the movement of people on your website, but the real deal is what you do with that data.
When you set up WordPress heatmaps with tools like Microsoft Clarity or UserFeedback, you can:
- Make your site better
- Improve your user experience
- Get more conversions (people taking action, like making a purchase or filling out a form)
Start tracking the things that matter most to your visitors and watch as your website’s performance changes!
