

If you want more control over your WordPress website’s analytics and you don’t want your data to go to big tech companies – then you can use Matomo.
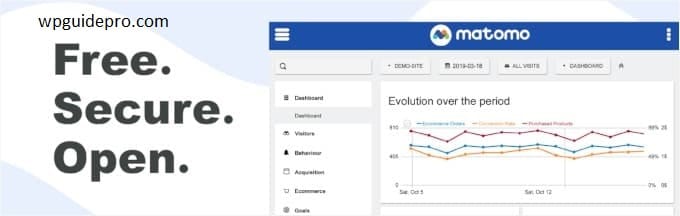
Matomo is a strong and private tool that gives you all the information that helps you grow your business and the best part is that your data remains yours.
This is the best option for people who are concerned about data privacy rules like GDPR or just want to ensure that their website data isn’t passed to any third party. And the best part is that you can connect Matomo to your WordPress website in just a few clicks.
In this guide, we will show you step-by-step how to easily set up Matomo Analytics in WordPress.
But before we begin the tutorial, we will explain the basics to you so you know what you are getting into.
If you have already decided that you want to use Matomo Analytics with WordPress, you can jump to the tutorial directly using the jump links below.
Table of Contents
Want to stay ahead with AI-driven change footer in WordPress insights and stay updated with the latest trends? Subscribe for daily search insights at wpguidepro.com to improve your WordPress strategy
What Is Matomo Analytics?
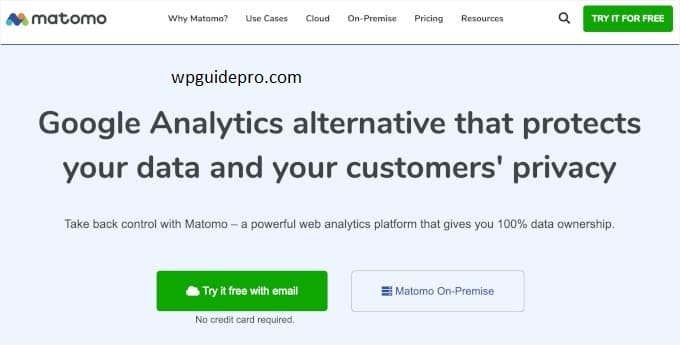
Matomo is an open source platform that tracks website traffic, user behavior and more
It is like Google Analytics but it takes care of the privacy of both website owners and visitors
How does it do this
The answer is simple, in Matomo your data is yours only, it either stays on your own server or in the cloud and you get full control
So what can you track with Matomo? Here are some important features
Campaign Tracking: You can see where visitors are coming from using UTM tags like ads, social media or emails
User ID Tracking: You can know login users on different devices and times how to move
eCommerce Tracking: You can track your sales cart usage and product views, especially if you are running WooCommerce or an online store
Form Analytics: You can see where people are stuck while filling out forms so you can make forms better and get more people to sign up
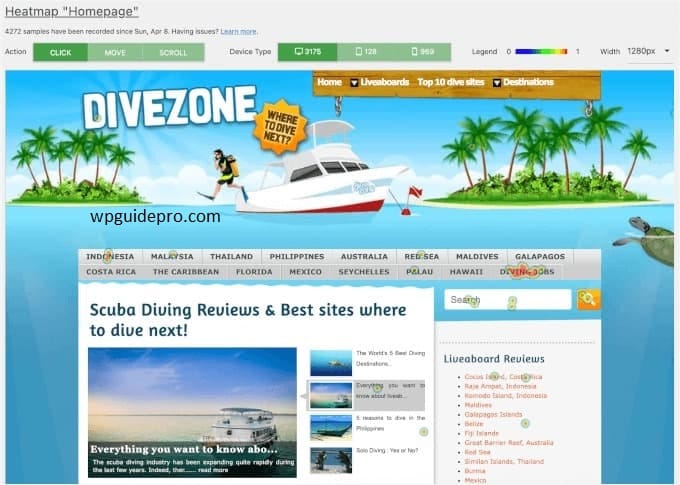
Heatmaps and Session Recording: You can see where people click, scroll or leave the website with the help of visual maps and recordings
Because Matomo lets you do all this with privacy, that is why many people have started using Matomo leaving other analytics tools
If you are also one of those people Those who want to shift from Google Analytics to Matomo, keep reading further so that you understand the difference
Matomo vs. Google Analytics
When it comes to choosing between Matomo and Google Analytics, it depends on which one you need more.
If you want to keep your data with you only, then Matomo is the best option for you.
This is an open source platform that allows you to keep your data on its own server.
This way your data remains with you only and privacy is also taken care of.
But on the other hand Google Analytics stores your data on Google’s servers.
If you are concerned about data privacy, then this thing can be important for you.
In terms of Analytics features Both Matomo and Google Analytics offer a lot of tools
like real time data and visitors tracking
Matomo also offers some extra things like heatmaps and session recording
But these features are available in paid plans
The advantage of Google Analytics is that it easily integrates with other Google tools
like Google Ads, Google Search Console and Google Tag Manager
If you are already using these tools then it can be quite helpful
Google Analytics is also very strong for advanced reports and analysis
like custom funnels and predicting the future
And since Google Analytics is so popular, it also has a large community of users and guides if you need to use any There is a problem in things
If we talk about cost, the free version of Google Analytics also comes with a lot of features
But its paid version Google Analytics 360 is expensive
Matomo gives you flexibility
If you want, you can use the free version which is installed on your server
Or use the paid cloud version which is hosted online
This way you can choose the option according to your budget
If you have not yet decided whether to use Matomo or not
Then our recommendation is that you use Google Analytics
We also use it in our business because its reports are in detail which help in improving marketing
But Google Analytics The interface can be a bit tricky at times. That’s why we recommend that you install the MonsterInsights plugin. This is a simple WordPress plugin that displays your Google Analytics data in the form of simple reports and charts in the WordPress dashboard.
How to Set Up Matomo Analytics in WordPress
Ready to set up Matomo? Let’s do a small system check first!
Your WordPress website should have WordPress version 4.8 or newer. Also PHP version 7.2 or higher.
MySQL should be 5.5 or higher, and we recommend at least 128MB of memory available today.
When you go to the plugins section of WordPress, you will find many Matomo plugins.
But in this guide we will use the “Matomo for WordPress” plugin.
Now in the next steps we will show you how to set up Matomo in WordPress.
Step 1: Installing the Matomo for WordPress Plugin
The first step install and activate Matomo for WordPress plugin.
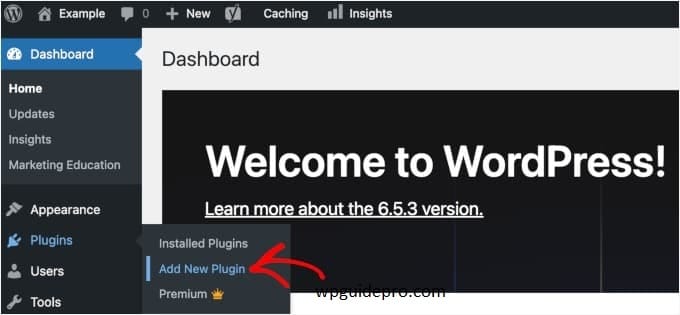
Go to dashboard of your WordPress site, then click Plugins » Add New Plugin.
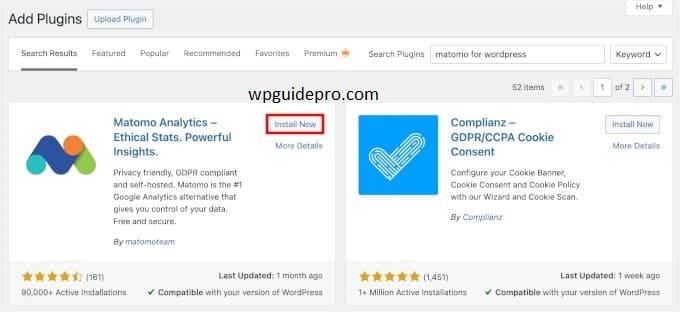
On the new page open, type Matomo for WordPress search box and press enter.
When the result of the Matomo plugin comes up, click on the Install Now button.
Then after that, click on the Activate button so that the plugin starts working.
Step 2: Enabling Matomo Tracking on Your WordPress Site
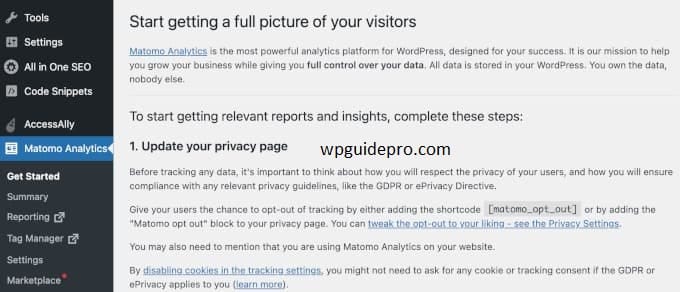
When you activate Matomo, you are redirected to the Matomo Analytics » Get Started page.
From here you follow the setup wizard where you complete two steps:
- Updating the Privacy Policy page
- Enabling Matomo tracking
The plugin saves your settings and applies them.
Step 1: Updating Privacy Policy
First of all, you have to update the Privacy Policy page of your website.
Matomo wants you to show that you take care of user privacy and follow rules like GDPR.
In this, you have to give an option in which the user can opt out of tracking. To give this option you can use the [matomo_opt_out] shortcode or the ‘Matomo opt-out’ block.
If you do not have a privacy policy page yet, you will have to create a new one.
For this, go to the WordPress dashboard, then click on Settings » Privacy.
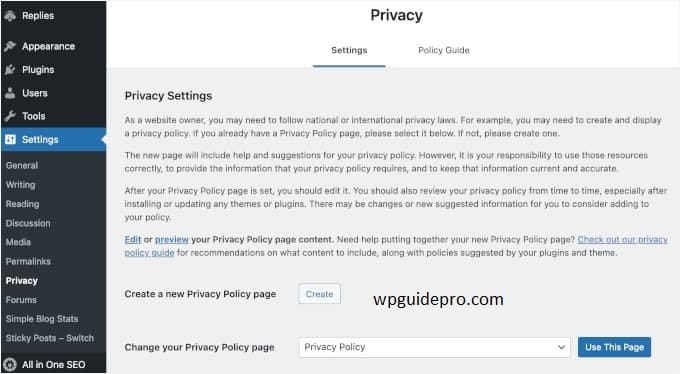
There you will find a drop-down menu. If WordPress has already created a privacy page, click on the ‘Use This Page’ button.
If you want to create a new page, click on the ‘Create’ button, WordPress will create a draft for you.
And if you are using an old page and want to edit something in it, press the ‘Edit’ button.
This will open your privacy page in the block editor, where you can make changes.
Extra Tip: If you want to improve your website privacy, try the WPConsent plugin. It handles cookie banners and user consent with ease. There is a free version available as well.Step 2: Enable Matomo Tracking
Once you have updated your privacy policy, you are now ready to enable tracking.
Go to the Get Started page and click the ‘Enable tracking now’ button.
If everything goes well, you will see a green checkmark and a success message.
Matomo takes some time to collect data, so don’t worry if you don’t see the stats right away. Check again after a few hours, you will start seeing the stats of your visitors
Step 3: Navigating Through the Analytics Dashboard
This is where you will find important data about your website like who are the people who are visiting, what are they doing, and how is your site performing.
In this section we will look at 3 important things: Summary, Reporting, and Tag Manager.
Each feature gives you different information and tools that help you track your website.
Summary
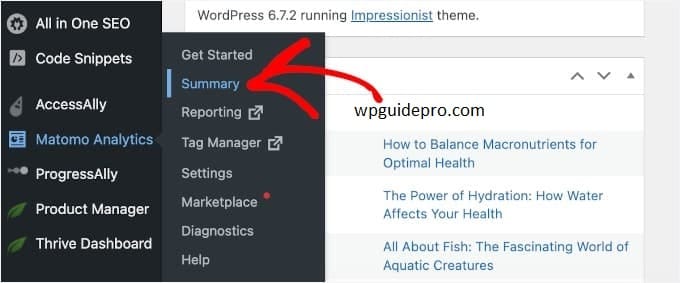
The “Summary” section gives you a brief overview of your website within WordPress.
Just go: Matomo Analytics » Summary
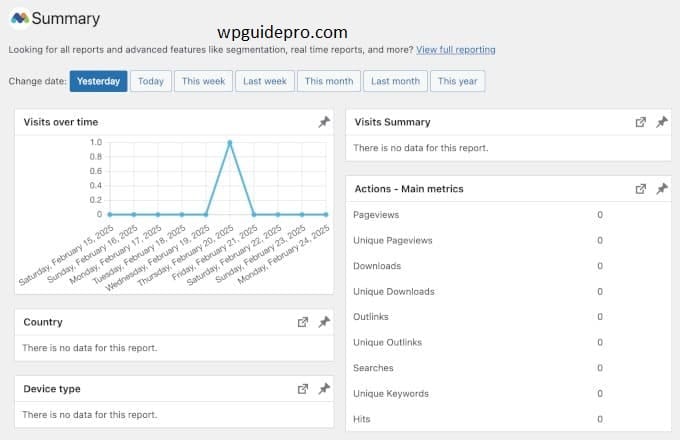
There you can see key visitor stats like:
- How many people came
- Which country did they come from
- Which device did they use
- What did they do on the site
- You can also select a time today, this week, this month, or this year.
Scrolling down, you will get more information, such as:
- User’s screen size, browser, OS
- Which page came and which page went from
- Stats of goals and conversions
- Hour-wise visits, shipping info, discounts if you are running a store
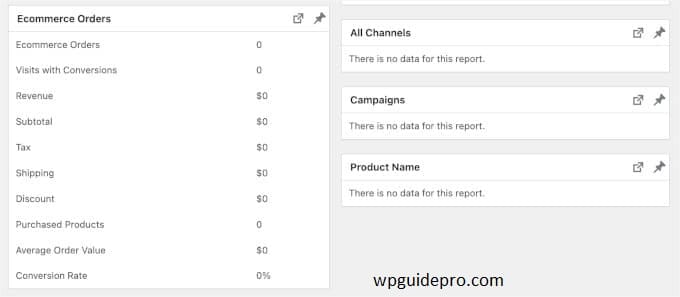
If you are running an online store, then in the Ecommerce Orders section you will get full details of orders and products – how many orders came, how much tax, shipping charges etc.
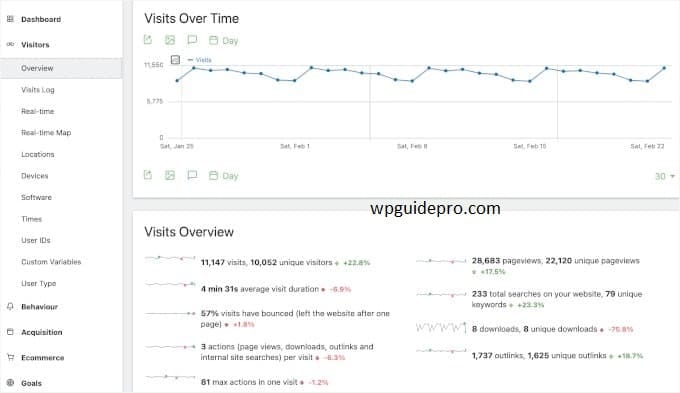
Reporting
If you want more details, then you will get everything in the “Reporting” section.
Just go to the WordPress dashboard: Matomo Analytics » Reporting
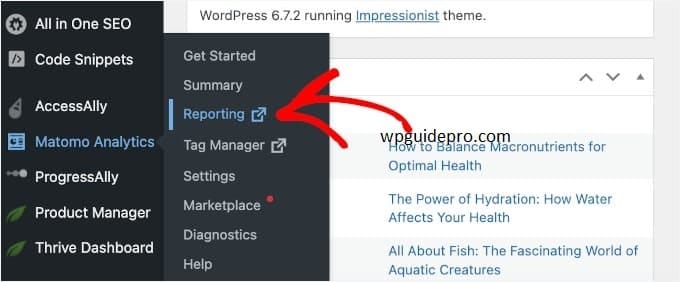
Here you can see detailed reports like:
- Visitor data – which people are coming to the site and from where
- User behavior – what are the logs doing on the posts and pages
- eCommerce – details of sales and orders
- Marketing – Goal tracking, sales funnel, form tracking
- Media – performance of videos and images
- A/B testing – compare two pages
- Heatmaps – where do the logs click on the site
- Session recording – how the logs use the site is recorded
Each topic has its own panel which you can explore.
Like in the “Visitors” section you can see real-time data, maps, logs and user devices etc.
All this data will help in making your site better.
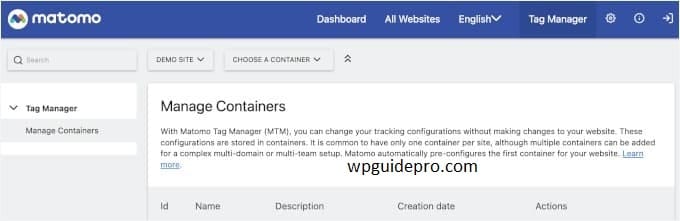
Tag Manager
Matomo also has its own Tag Manager.
Just like Google Tag Manager, this is also a simple way to add tracking code or ad code to your WordPress site without coding.
But Matomo’s Tag Manager is even more advanced. You can handle different analytics and marketing tools from one place.
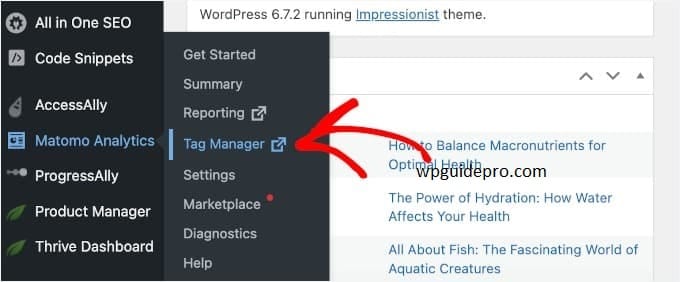
You can easily add code from first-party or third-party tools.
- To access it go to: Matomo Analytics » Tag Manager
- There you can manage your tracking setup using “containers”.
A container is a group of tags, triggers, and variables which are easy to handle.
Matomo Alternatives: Top Analytics Plugins for WordPress Users
But if you want to look at more analytics tools, here are some good Matomo alternatives:
MonsterInsights
- This is the best Google Analytics plugin for WordPress.
- It is very easy to use especially for beginners who want simple reports in their WordPress dashboard.
- We also use it to track conversions, referrals, and more.
- If you want to see more details, be sure to check out our MonsterInsights review.
ExactMetrics
- This plugin gives more detailed Google Analytics reports.
- Best for people who want in-depth info without leaving WordPress.
- We’ve tested it in great detail read our ExactMetrics review to find out.
OnePageGA
- This tool displays Google Analytics 4 data in a simple one-page dashboard.
- If you’re a beginner and want a simple setup without extra features, this is perfect.
- Check out our OnePageGA review for full details.
HubSpot
- This is an all-in-one CRM tool with built-in analytics.
- You can track website traffic, user behavior and conversions.
- Check out our article to learn how to setup HubSpot analytics in WordPress.
If you want to see more analytics tools that are best for WordPress, check out our list: Best Analytics Solutions for WordPress Users
Recommened Guide:
Post analytics : https://wpguidepro.com/boost-traffic-with-wordpress-post-analytics/
Cookies blocked error : https://wpguidepro.com/cookies-blocked-error-in-wordpress/
Visual regression testing : https://wpguidepro.com/easily-visual-regression-testing-in-wordpress/
WordPress core guide : https://wpguidepro.com/wordpress-core-ultimate-guide/
Broken CSS in admin dashboard : https://wpguidepro.com/fix-broken-css-in-wordpress-admin-dashboard/
