

Yes, it is possible! Installing WordPress on a USB stick is not only possible, it is also very useful. You can use it to test your themes, plugins or anything else without leaving your live website.
And the best part? You can work without internet, and take your WordPress setup anywhere — just plug in the USB and start working!
In this guide, we will learn step by step how to install WordPress on a USB drive, using XAMPP (which is a small and free web server software).
By the time you reach the end of this post, you will have a full WordPress website that can run on any computer. you just need to connect to USB!
Want to stay ahead with AI-driven change footer in WordPress insights and stay updated with the latest trends? Subscribe for daily search insights at wpguidepro.com to improve your WordPress strategy.
Table of Contents
What is XAMPP, and Why Use It?
XAMPP is a free and open-source software that creates a local server. Meaning you can setup a small website on your computer where you can practice.
It contains some important things like:
- Apache (this is the web server)
- MySQL (this is the database)
- PHP (this is the coding language of the website)
All these things are necessary to run WordPress together.
What is the advantage of XAMPP in USB?
If you install XAMPP in a USB drive, then you can run your entire WordPress setup on any computer. Just plug in the USB and start working!
Before starting you need these things:
- A USB stick with at least 4GB of free space (8GB is even better)
- A computer where you have admin rights (so you can install software)
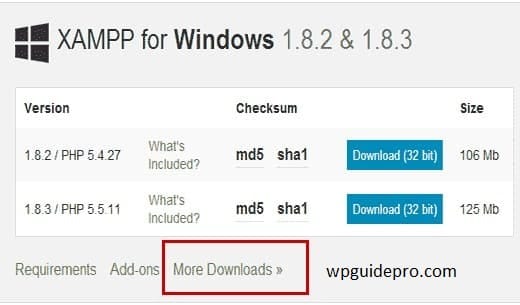
- The latest version of XAMPP
- The latest version of WordPress
Step 1: Format the USB Drive
Why is formatting necessary?
If you want everything to go smoothly, it is necessary to format your USB first. The advantage of this is that the USB works well in every computer, and no error occurs.
How to format a USB drive?
Insert the USB stick into the computer.
If there are any important files in the USB, take a backup of them first, because formatting deletes all the files.
Now format the USB:
If your computer is Windows:
- Open “File Explorer”.
- Right-click on the USB drive and select “Format”.
- Select FAT32 in the file system.
Then click on Start.
If your computer is Mac (macOS):
- Open “Disk Utility”.
- Select the USB drive and click on “Erase”.
- Select MS-DOS (FAT) in Format.
- Then click on “Erase”.
When the formatting is done, your USB stick is ready to install WordPress!
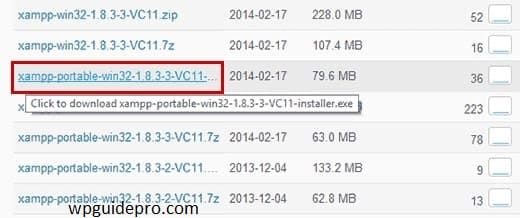
Step 2: Install XAMPP on the USB Drive
Installing XAMPP (on USB)
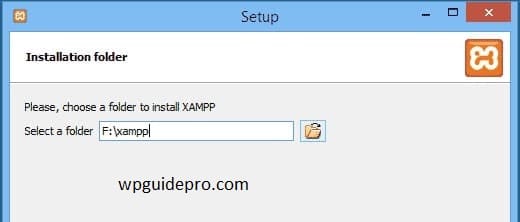
- Run the XAMPP installer you downloaded earlier.
- When asked where to install, select your USB stick (like E:/ or D:/).
When options appear, select only these things:
- Apache
- MySQL
- PHP
- phpMyAdmin
Deselect the rest of the options to save space.
Now follow the instructions that appear on the screen.
When the process is complete, XAMPP will be installed on USB.
XAMPP Installed or Not Check
- Go to your USB stick and open the “xampp” folder.
- Open the xampp-control.exe (Windows) or manager-osx (Mac) file in it.

- Start both Apache and MySQL from the Control panel.
Open your browser and write in the URL bar: http://localhost/ If you see the XAMPP dashboard, then understand that everything has been installed correctly
Step 3: Create a MySQL Database
To run WordPress you need a database where all the content is stored. We will use phpMyAdmin for this.
How to create a database?
Open your browser and write:
- Click on the “Databases” tab from the top menu.
- Write a name for your database (eg: wordpress_db)
- Then select utf8_general_ci on the side (this is the language setting).
- Now click on the “Create” button.
Now your MySQL database is ready to connect with WordPress!
Step 4: Add WordPress Files to XAMPP
Preparing WordPress Folder Unzip
The WordPress ZIP file Unzip (or extract) the WordPress file you downloaded earlier. After that you will find a folder named “wordpress”.
WordPress Folder in XAMPP’s htdocs
Go to the XAMPP folder in your USB stick: E:/xampp/htdocs/ (or wherever you installed XAMPP) Now copy the “wordpress” folder you found and paste it here.
Changing the name of the folder
If you want, you can change the name of the “wordpress” folder, such as: mywordpress so that it is easy to remember later.
Step 5: Install WordPress
Setting up WordPress Open your browser and type this URL:
http://localhost/wordpress/ If you have changed the name of the folder (such as mywordpress), then write this:
http://localhost/mywordpress/ Now a screen will appear asking you to select a language. Select the language of your choice and click on Continue.
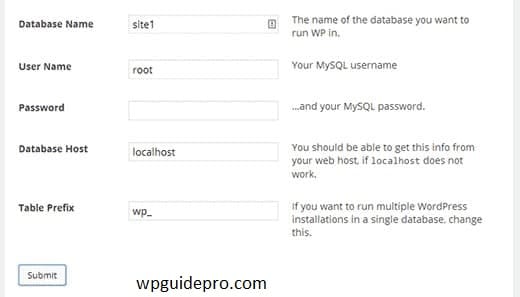
Now a form will appear where you will have to provide information about the database:
- Database Name: the name you created earlier (eg: wordpress_db)
- Username: root
- Password: empty (keep it blank)
- Database Host: localhost
- Table Prefix: wp_
Then click on Submit.
If everything is fine then a new button will appear:
- Run the Installation click on this.
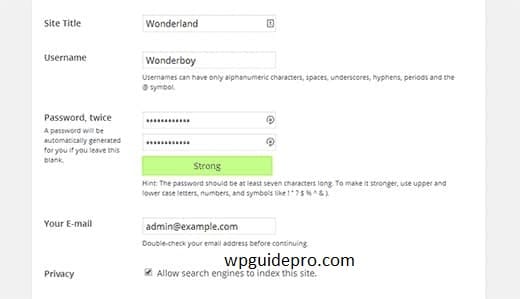
Now fill in the details of your site:
- Site Title: Write the name of your website
- Username & Password: whatever you want to use to login
- Email Address: Write your email so that if you forget your password, you can get it back
Then click Install WordPress
Login to WordPress When the installation is complete, write this in the browser:
http://localhost/wordpress/wp-admin/Write your username and password and login. Now your WordPress dashboard will open
Step 6 (Optional): Make WordPress Portable
If you want to take your WordPress setup to another computer then:
- Keep all the files of XAMPP and WordPress in your USB stick.
- (There is no need to copy anything to the computer.)
- When you want to work on another computer, just plug in the USB stick,
- Start XAMPP the same way as you did before,
and type in the browser:
http://localhost/wordpress/ But remember one thing: The letter of the USB drive (like E:/ or D:/) can be different in every computer.
If any issue arises, then you will have to adjust the path of XAMPP by checking the drive letter.
Why Use WordPress on a USB Drive?
- Work offline: Internet is not required. You can work on WordPress even without internet.
- Test safely: You can test themes, plugins or code comfortably without ruining your original website.
- Carry it in your pocket: You can carry your WordPress site and all your work on a USB stick and use it on any computer
Conclusions
Now if you put XAMPP and WordPress on a USB stick, you have a small portable web development tool.
Whether you are working offline, testing a design, or trying something new, this setup gives you complete freedom and ease.
If you liked this guide, bookmark it or share it with a friend who needs a small portable WordPress setup!
Recommended Guide:
WordPress core explained : https://wpguidepro.com/wordpress-core-ultimate-guide/
Fix login redirect : https://wpguidepro.com/fix-wordpress-login-page-redirecting-issues-quickly/
Syntax error solution : https://wpguidepro.com/fix-wordpress-syntax-error-2-easy-tips/
Fix broken CSS in admin : https://wpguidepro.com/fix-broken-css-in-wordpress-admin-dashboard/
Post analytics for WP : https://wpguidepro.com/boost-traffic-with-wordpress-post-analytics/
