
")
Do you want people to be able to make appointments, reservations or booking form on your WordPress website? A good booking form can make your work easier and make it easier for people to get the service.
If you run a restaurant, salon, consulting or any other service business, an online booking system eliminates the hassle of phone and email. People can make bookings anytime, day or night, and you can control everything from the WordPress dashboard.
In this guide, we will show you two ways to easily create a booking form in WordPress. We will tell you step by step how to install it and how to customize it according to your needs. You can start taking bookings immediately.
Want to stay ahead with AI-driven WordPress insights and stay updated with the latest trends? Subscribe for daily search insights at wpguidepro to improve your WordPress strategy!
Table of Contents
Why Create a Booking Form in WordPress?
If you put a booking form on your WordPress site, it is beneficial for both you and your customers.
Save time and work hard
Taking bookings manually is a difficult and time-consuming task. You have to respond to phone calls, messages and emails immediately. All this work is automated with the booking form. Customers themselves make the booking after checking the available time.
Give easy service to the customer
Nowadays people want ease. They prefer to take appointments on their own time, not just during business hours. Online booking forms are available 24 hours a day. Be it midnight or lunch break, people can book whenever they want.
Reduce No-Shows and Double Booking
The online booking system sends automatic emails and reminders to customers. This way people do not miss their time. The system shows real-time availability, so two people do not book at the same time.
Collect important information
The booking form does not only collect name and number, but also other important information. Such as type of service, any special requirement, or payment information. With this information, you can make good preparations for every appointment.
Earn more
When people can easily book a service, they make more bookings. You can also earn more money by showing extra services or premium offers through the form.
Method 1: How to Create a Booking Form Using WPForms (Recommended)
WPForms is the easiest form builder plugin for WordPress. That’s why we recommend it for creating booking forms. This plugin has drag-and-drop feature and ready-made templates specifically designed for appointments and reservations.
Step 1: Install and activate WPForms Plugin
First of all, you have to install the WPForms plugin.
- Go to your WordPress dashboard
- Click on Plugins > Add New
- Search for WPForms
- Install any plugin from WPForms team
Then activate it
To use booking features, you need WPForms Pro version. It has advanced features like conditional logic, payment system and email notifications. It is a great investment.
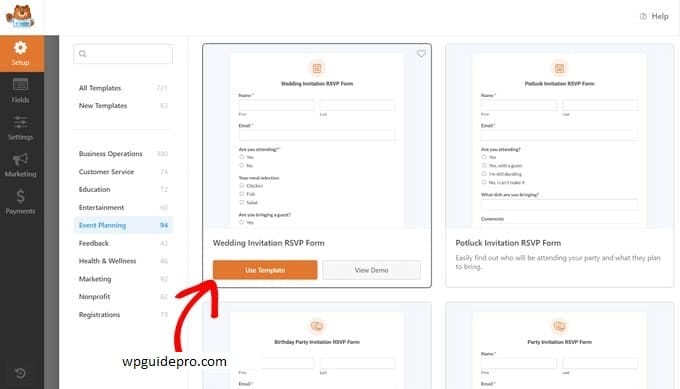
Step 2: Create your booking form After activating the plugin:
- Go to WPForms dashboard > Add New
- You will see a lot of ready-made templates
- Choose Request Quote or Contact Form template
- Click on that template
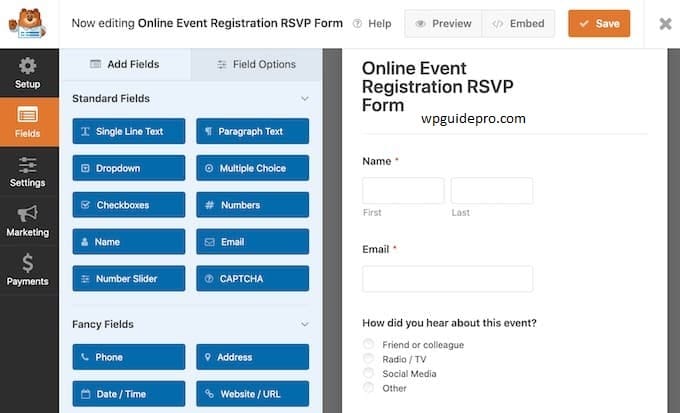
The form builder is very simple. Drag the fields from the left side and drop them in the form.
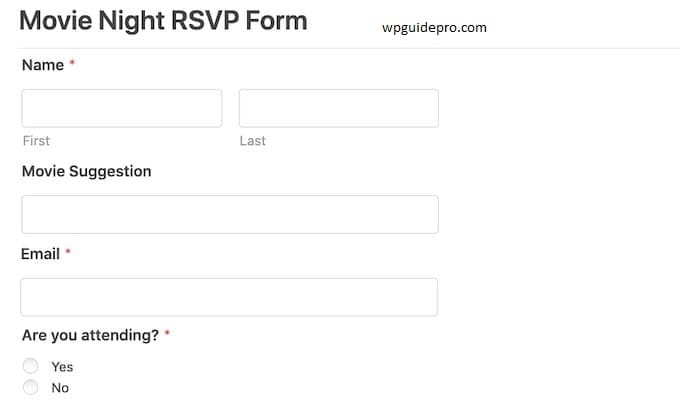
Step 3: Add required booking fields
The form must have these fields:
- Name and Contact Info: Full name, email, phone number
- Service Selection: Your services should be listed in a dropdown menu
- Date Picker: Calendar in which the customer can select the date
- Time Selection: Radio buttons or dropdown to select the time
- Additional Info: A text box where the customer can write an extra request
- Payment Info: If you take deposit or full payment
Use Date/Time field for date and Dropdown field for services.
Step 4: Set Form Settings
Go to Settings tab and set these options:
- General Settings: Write the name of the form and a short description
- Notifications: Whenever someone fills a form, you get an email
- Confirmations: Thank-you message or redirect to a page
- Conditional Logic: If the customer selects something specific, show new fields
Email notifications are important so that you know immediately if someone has made a booking.
Step 5: Put the form on your website
After creating the form, it is very easy to add it to the WordPress site:
- Use the WPForms block on any page or post
- Copy the shortcode and paste it on the page/post
Put it in the sidebar or footer via widget
The best would be to create a new page named Book Now or Schedule Appointment, and put the form on that page. This gives the customer a clear way to make a booking.
Method 2: How to Create a Booking Form Using Formidable Forms
Formidable Forms is also a great plugin that helps you create booking forms in WordPress. This plugin is best for businesses whose bookings are more detailed, such as extra information, file upload, or calculations.
Step 1: Install Formidable Forms Plugin
- Go to your WordPress dashboard
- Click on Plugins > Add New
- Search for Formidable Forms
- Install the plugin and then activate it
Free version is also available, but if you want payments and email notifications, then you must get the Pro version. After activating the plugin, complete the setup wizard.
Step 2: Choose Booking Form Template
- Go to Dashboard Formidable > Forms
- Click on Add New
- Templates list will appear choose one as per your work
If you want to start from basic then you can use “Contact Us” template. If you want to make your own design then you can start with blank form also.
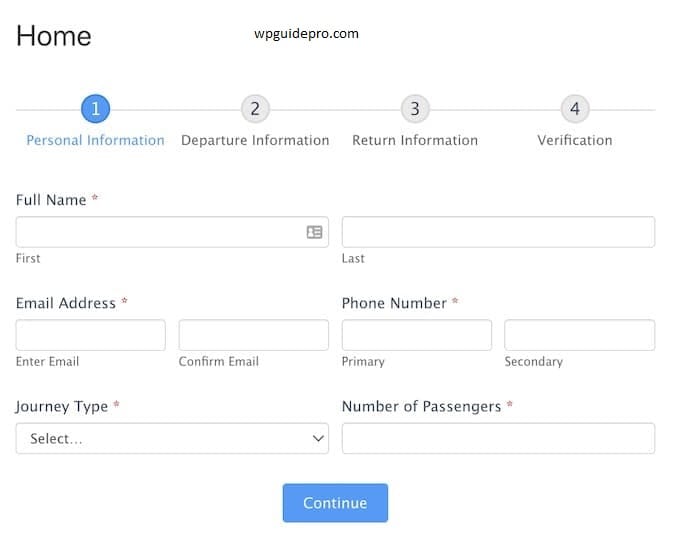
Step 3: Add Fields in Form
You can easily customize fields in Formidable Forms. Add required booking fields:
- Personal Info: Name and email field
- Service Selection: Dropdown or radio button listing your services
- Date/Time Selection: Date picker and dropdown for time slot
- File Upload: If you want to send a document or image to the customer
- Calculation Field: If there is more than one service, the total amount will be auto calculated
If the customer chooses Hair Coloring, you can also show a color preference field using conditional logic.
Step 4: Set up Automated Emails
You can set up email alerts for both yourself and your customers:
- Admin Notification: Whenever a booking is received, you receive an email
- Customer Confirmation: Customer gets details of the booking
- Reminder Email: To remind you once or more before the appointment
In these emails, be sure to include full details of the appointment, business address, cancellation method, and contact information.
Step 5: Set up Payments
If you want to receive payment along with the booking, Formidable Forms works with payment methods like PayPal and Stripe.
Go to form settings and set up payment, and set the price according to the service selection. When the customer pays in advance, he takes his booking more seriously, and no-shows are less.
Step 6: Show the form on the website
There are many ways to show the booking form:
- Shortcode: copy the shortcode of the form and paste it in the page or post
- Gutenberg Block: use the Formidable block in the WordPress editor
- Widget: put the form in the sidebar or footer
- PHP Code: Developers can also add the form in the theme file
The good thing is that you can put a Book Now button in the header or menu of your site which takes you directly to the booking page. Due to this, customers do not need to wash the form.
Maximizing Your WordPress Booking Form’s Effectiveness
Just making a booking form is not enough. If you want more people to book and keep your customers happy, follow these extra steps:
It is important to work well on mobile WPForms and Formidable Forms both make mobile-friendly forms. But still test your form on mobile, tablet and small screen. People often make bookings from their phones, so filling the form should be easy and clear.
Give clear instructions It is helpful to write small instructions inside the form. Like:
- What is the cancellation policy
- Give examples of difficult fields
- Write how much time it will take to get a reply
This will not confuse the customer.
Link it with the calendar
If you connect your booking form with Google Calendar or Outlook, it will be easy for you to manage availability. The chance of double booking also ends.
- Send follow-up emails Set up automated emails with your form. Do these things:
- Send a confirmation email immediately after booking
- Send a reminder 24 hours before the appointment
- Send a thank-you or feedback message after the service
These steps make your customer feel valued.
Create a Good Booking Form
Make Your Business Strong A good booking form turns your WordPress website into a powerful business tool. Whether you choose the simple way of WPForms or the advanced setup of Formidable Forms, both make your job easy.
Get started today and see how your online bookings increase and your manual work becomes less of a task.
