

Both images and comments are a good way to engage your website users. If your site is on a topic where people want to share their thoughts or work through images, then this option will involve them even more.
In this article, we will tell you a simple way by which you can enable the option to image uploads WordPress comments.
Want to stay ahead with AI-driven WordPress insights and stay updated with the latest trends? Subscribe for daily search insights at wpguidepro to improve your WordPress strategy!
Table of Contents
Why Allow Users Image Uploads WordPress Comments?
WordPress comments are a simple way to communicate with your visitors. People give their feedback, ask questions, or share a good idea that helps improve your website or product.
If you give users the option to upload images in the comments, their experience becomes even better. For example, if someone has a problem, they can share a screenshot of their problem, which you can easily understand and help.
People also share funny pictures and memes, which makes the comments more interesting and worth watching.
And if you are running a travel blog, then people can also post photos of their trip in the comments. Places they liked or places they visited. Such comments make your site more interesting and lively.
Allow Users Image uploads WordPress Comments
First of all you have to install the DCO Comment Attachment plugin and then activate it.
If you don’t know how to install the plugin, then check out our simple guide – every step is explained easily in it.
As soon as the plugin is activated, it will start working automatically. Now whenever someone comments, he/she will also get the option to upload an image or file.
If you want to change its settings, then go to Settings in the WordPress dashboard, then click on DCO Comment Attachment, you can control everything from there.
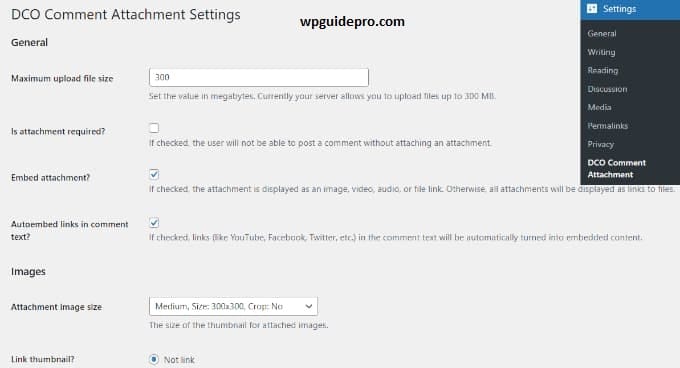
This plugin gives you the control over how much size you want to keep for file upload, whether it is necessary to attach the file or not, whether the image should be shown in the comment or not, and what should be the size of the image all these you can set easily.
You can also allow users to upload different file types. Like document, PDF, PowerPoint, Excel file, and many more. You just have to check the file type option.
There is also another option in which you can decide whether all users can upload files or only those who have logged in.
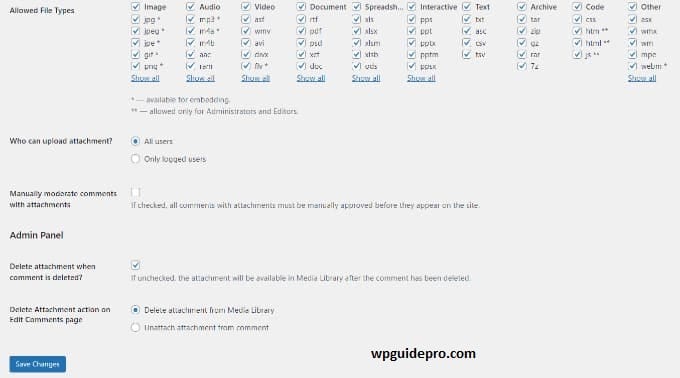
Once you have set all the settings, do not forget to click on the Save Changes button.
After that, go to any post page of your WordPress blog, there you will see the option to upload an image in the comments area exactly like shown in the screenshot below.

All the images that people upload in comments are saved in WordPress’ media library.
If you want to delete an image, go to Media » Library, find the image and delete it.
Deleting the image will only delete the photo, the comment text will remain as it is.
To avoid uploading anything wrong, you can add a small list of comment rules on your site that states which files are allowed.
You can also see an example of wpguidepro comment policy.
After that, you can add a link to your comment policy below the comment form so that every user can read it.
Because images are sometimes not perfect, it is better to first check every comment and then show it on the site.
You can turn on comment moderation and users can also get notifications when comments are approved.
If you want, you can also turn on the oEmbed option.
This will allow people to share YouTube videos, tweets, Flickr photos etc. in their comments not just photos, but other things too.
