

Downloading your entire WordPress media library may be necessary for a variety of reasons like making backups, shifting to another website, or organizing files offline.
When you complete a full download of your media files, you always have access to images, videos, and other uploaded content when needed.
At WPGuidePro, we regularly back up our media library. This helps us retrieve important files quickly, avoid problems, and keep all images and videos safe for the future.
In this article, we will show you step by step how you can easily download your entire WordPress media library
Want to stay ahead with AI-driven change footer in WordPress insights and stay updated with the latest trends? Subscribe for daily search insights at wpguidepro.com to improve your WordPress strategy
Table of Contents
Why Download the Media Library?
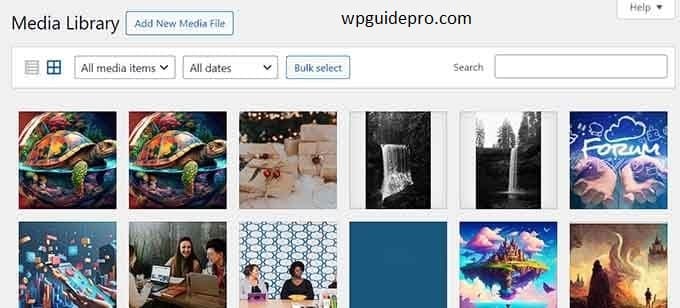
The WordPress media library contains everything you upload to your website — such as pictures, videos, and files.
If you want to back up these things, you can download the media library and save them to your computer
You can also use a special tool that backs up the entire website — such as pictures, posts, and settings.
But too many tools don’t make it easy to back up just pictures and videos separately.
You can also download the media library using your hosting website or FTP software. But these methods can be a bit tricky and time consuming for new users
Method 1: Download Media Library Using The Export Media Library Plugin
In this method, we will use a free plugin to download media files.
If you don’t know how to install the plugin, you can check out our beginner’s guide.
Note: This plugin has not been tested with the new WordPress version, but we used it on our demo website and it worked perfectlyAfter activating the plugin, go to the Media » Export page in the WordPress admin area.
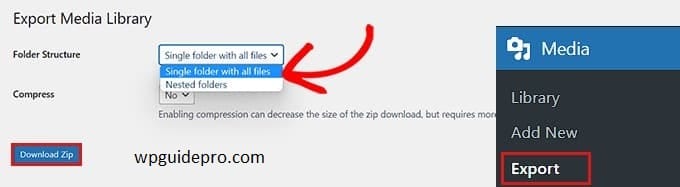
Once there, select the ‘Single folder with all files’ option from the dropdown next to ‘Folder Structure’.
Now all your images will be downloaded in a single folder. These images will be in their original file types, such as JPG, PNG, or SVG.
If you want the media files to be in separate folders (e.g., according to the upload time), select the ‘Nested Folder’ option.
After that, click on the ‘Download Zip’ button — and your entire media library will be downloaded in a single zip file on your computer.
Method 2: Download the Entire WordPress Backup Including Media Files
If you want to backup your entire WordPress website including media files then this method is for you.
We will use the Duplicator plugin, one of the best WordPress backup plugins. Using this plugin, you can backup your entire website.

First, you need to install and activate the Duplicator plugin. If you don’t know how to install the plugin, you can check out our guide.
Note: Free version of Duplicator is available, but we are using the pro version.After activating the plugin, go to the Duplicator » Backups page from the WordPress dashboard and click the ‘Add New’ button.
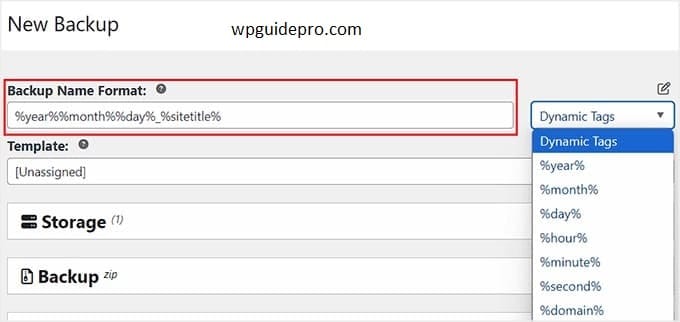
Then, you need to name your backup. You can name it anything that you remember after downloading the backup.
You can also use dynamic tags, in which date, time and website name are automatically added.
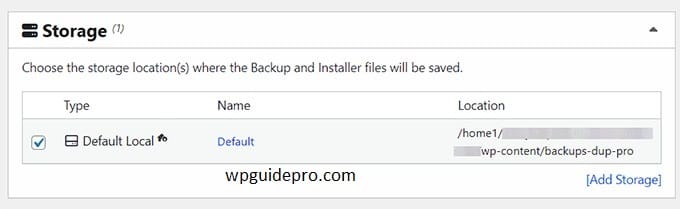
After that expand the Storage section and choose the default location. If you want to add another location, click on ‘Add Storage’.
Then click on the ‘Next’ button below.
Now the plugin will scan your website to show if there are any errors.
When the scan is complete, click on the ‘Create Backup’ button.
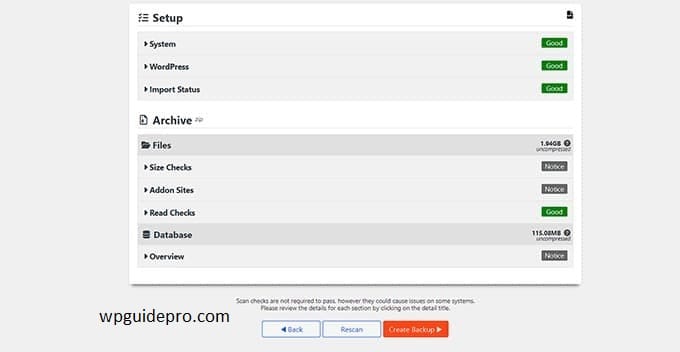
Note: If any error occurs in the scan, first fix that error and then scan again and create a backupWhen the backup is ready, click on the ‘Download’ button and then on the ‘Both Files’ button.
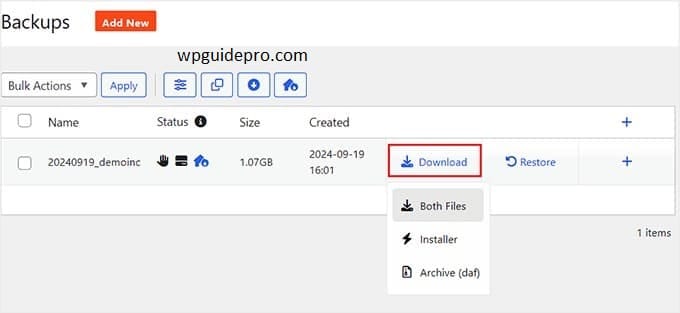
Now you will have 2 files downloaded installer and archive.
Method 3: Download Media Library Using WordPress Settings
Here we will tell you an easy way to download all the files of your WordPress media library and use them on another website – without any plugin. Example: If you have created a new WordPress website that is related to the first website, then you can use the same images on both websites.
Note: This method is done without using a plugin, but we do not recommend it as it exports your media files in the form of XML files (which can be a little tricky).Download method:
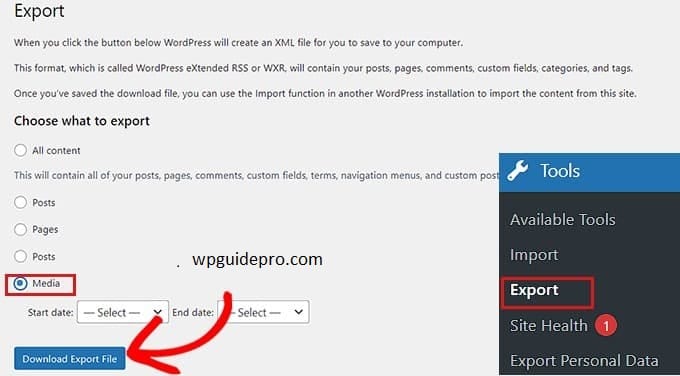
- Go to the WordPress dashboard and open the Tools » Export page.
- There select the option of ‘Media’.
- If you want data of only some time then you can choose the date range.
- Then click on the ‘Download Export File’ button.
- Now your media library will be saved in your computer in the form of an XML file.
Now upload the file on another website:
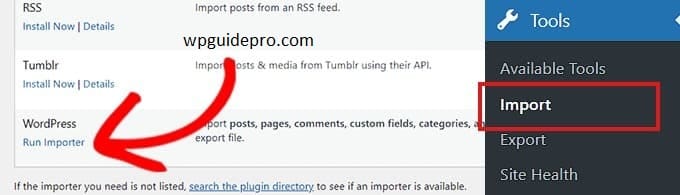
- Go to another website and install and activate the WordPress Importer plugin.
- (If you do not know how to install then check our guide)
- Then go to Tools » Import page.
- There click on the ‘Run Importer’ link below ‘WordPress’.
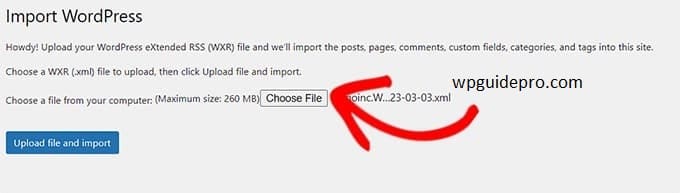
- Now click on the ‘Choose File’ button and upload the XML file.
- Lastly click on the ‘Upload file and import’ button
Bonus: Restrict Media Library Access to User’s Own Uploads
When you import your media library to another WordPress website, you can have every author view only their uploaded images if you want.
This option is useful when you have many authors on your website or you allow guest blog posts. This will make your website more secure.
To restrict media library access, you need to install and activate the Restrict Media Library Access plugin.
When you activate this plugin, it will start working directly. It will check whether the user is an admin or editor.
If the user is not an admin or editor, he will only see his own uploaded images – not anyone else’s.
If you need more details, you can check out our guide on how to make each user see only their own images.
I hope this article helped you download the entire WordPress media library. You can also check out our other guides if you want:
- How to lazy load images in WordPress
- List of Best WordPress slider plugins
