

It is not easy to keep your WordPress website perfect after every update or design change. Sometimes even a small change can ruin the website design. Visual Regression Testing (VRT) is used to find such problems beforehand.
This is a simple and powerful method that finds small and big problems in the website design before users.
In this guide, we will tell you step by step how visual testing is done within WordPress.
Whether you are a developer, designer or a website owner this tutorial will help you keep your website design neat and clean, without any extra tension.
Want to stay ahead with AI-driven change footer in WordPress insights and stay updated with the latest trends? Subscribe for daily search insights at wpguidepro.com to improve your WordPress strategy.
Table of Contents

What Is Visual Regression Testing, and Why Is It Important?
Visual Regression Testing is a way to compare your website’s current design with its old design (baseline). It’s like having a big magnifying glass that shows every little change pixel by pixel.
Why is this important?
• Prevents user frustration: Imagine if a button is not in the right place or an image is missing – such design problems make a website awkward and people lose trust.
• Saves time: Instead of manually checking every design part, VRT tools automatically find the differences this saves a lot of time.
• Prevents major mistakes: Even a small design mistake can spoil the performance or sales of a website. VRT helps find such problems quickly and you can fix them.
If you are running a WordPress site then it is important to use VRT so that your site design remains perfect even after updating theme, plugins or custom code.
Step 1: Install and Activate the Visual Regression Testing Plugin
The easiest way to perform Visual Regression Testing in WordPress is to use a special plugin. Start here:
Go to your WordPress Dashboard: First, login to your admin panel.
Click on “Plugins” > then go to “Add New”.
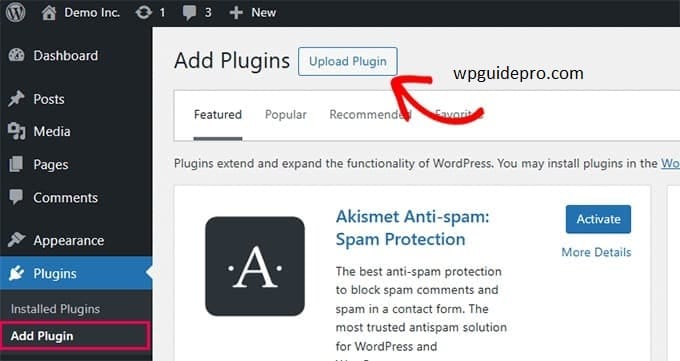
In the search box, type: “Visual Regression Testing” then look through the list of plugins
Install and activate a reliable VRT plugin, such as VRTs Plugin or WP Visual Compare.
These tools offer built-in features tailored for WordPress users, requiring no extra coding skills. Once activated, you’ll notice a new option for visual regression testing in your WordPress dashboard. Welcome to the world of easy visual testing!
Step 2: Configure the VRT Plugin Settings
After activation, the next step is configuring the plugin to suit your testing needs. Follow these steps:
Access Plugin Settings:
Most plugins create a separate menu item under your dashboard (e.g., “VRT Settings”).
**Set Your Baseline Screenshots**: – The baseline is your reference point for comparison. Testers typically capture these when the website is in its desired, error-free state.
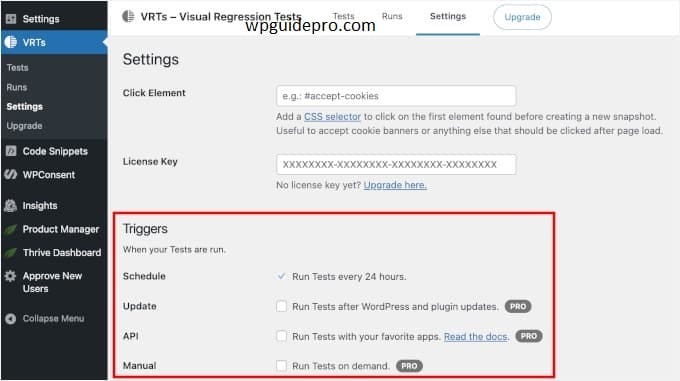
Define Trigger Events:
Specify when tests should run automatically.
For example:
After a plugin update.
Following changes to themes or custom CSS.
On-demand, for manual testing
Select Sensitivity Levels:
Adjust the sensitivity settings to determine how significant a visual change needs to be before it’s flagged. A lower sensitivity might detect even minor pixel shifts, while higher sensitivity focuses on noticeable changes.
Configuring your settings to align with your workflow will ensure accurate and actionable test results every time
Step 3: Add New Pages or Posts to Test
Not every page on your site needs a VRT. You’re best off prioritizing high-traffic and visually dynamic pages, such as:
- Homepage.
- Landing Pages.
- Product Pages (for e-commerce sites).
- Blog Posts featuring complex layouts.
Here’s how to add pages/posts for testing:
- Go to the plugin menu and select “Test Pages” or “Add Pages.”
- Enter the URLs of the pages you wish to track.
- Save your selection.
Some plugins also include bulk-import options for larger websites, saving you the effort of adding each URL manually
Step 4: Check for Visual Differences
Once you’ve configured the VRT plugin and added test pages, it’s time to perform the actual tests.
Run a Test:
- Most plugins provide a “Start Test” or “Run Test” button. Click it to begin processing.
- The software will capture screenshots of the selected pages and compare them to the baseline versions.
Review Visual Diff Maps:
- After the test, the plugin generates visual diff maps.
- These highlight changes with visual overlays, using colors like red to indicate altered areas.

Zoom in for Details:
- Many tools allow you to zoom into specific areas of the page for a closer look, ensuring no detail is overlooked.
- By leveraging automated comparisons, the plugin will do the heavy lifting, ensuring accuracy and efficiency.
Step 5: Review and Take Action
Once the test results are ready, it’s time to act on them.
Assess the Changes:
Determine if the flagged changes are intentional (e.g., recent design updates) or unintentional glitches.
Fix Any Issues:
Common issues may include:
Broken images.
Misaligned buttons.
Overlapping text caused by CSS updates.
Collaborate with your developer or designer to resolve these issues promptly.
Re-run the Tests:
After making fixes, re-run the tests to ensure the problem is resolved and your website is back to its ideal state.
By integrating this step into your update workflow, you can confidently deploy changes with minimal risk.
FAQs for Running Visual Regression Testing in WordPress
1. Do I need coding skills to use VRT in WordPress?
Nope! Most WordPress plugins for VRT are designed to be beginner-friendly. You can implement and run tests directly from your dashboard without touching a single line of code.
2. How often should I perform visual regression tests?
It’s best to perform tests:
- After every major plugin or theme update.
- Before launching site-wide changes.
- Regularly on high-traffic pages (e.g., monthly or bi-weekly).
3. Can I use free plugins for VRT?
Yes, there are free plugins with basic features. However, premium options typically offer better accuracy, customization, and support for larger sites.
4. Will VRT slow down my site?
Most plugins are designed in such a way that they do not slow down the speed of your website while testing. If you want, you can schedule tests at night when fewer people visit the site. this adds even more safety.
5. What should I do if there is no change on my site, yet the test shows differences?
This could be due to environmental factors like browser rendering differences or third-party scripts. Adjusting sensitivity settings or excluding specific elements from testing can help mitigate this
Keep Your WordPress Site in Picture-Perfect Condition
Visual regression testing isn’t just a tool for developers; it’s a vital process for anyone serious about maintaining their WordPress website. By catching design glitches early, you can protect your brand’s reputation, improve user experience, and save valuable time.
Don’t wait for a visitor to get frustrated. Start using Visual Regression Testing today so your website always looks perfect.
If you’re looking for an easier way, try one of WordPress’ best VRT plugins. you can get started in just a few minutes. Your users (and you yourself) will be happy!
Recommended Guide:
Boost traffic with post analytics : https://wpguidepro.com/boost-traffic-with-wordpress-post-analytics/
Matomo analytics setup : https://wpguidepro.com/matomo-analytics-wordpress-setup/
Fix CSS in admin dashboard : https://wpguidepro.com/fix-broken-css-in-wordpress-admin-dashboard/
WordPress core insights : https://wpguidepro.com/wordpress-core-ultimate-guide/
Syntax error tips : https://wpguidepro.com/fix-wordpress-syntax-error-2-easy-tips/
